


As remote work, online communication, and content creation continue to grow in popularity, webcam recording has become an essential skill for professionals and hobbyists alike. Producing high-quality videos using a webcam requires more than just a capable device; it’s also crucial to optimize your setup for the best lighting, audio, and overall recording environment. This article will explore the key factors in creating a professional webcam recording setup and offer practical tips for achieving top-notch results.
Did you know that over 60% of online content, much of which is video-based, is recorded using web cameras to be shared on platforms like YouTube? With the rise of virtual communication, having a reliable webcam recorder is essential. Whether for work presentations, online classes, or creating content, a quality webcam recorder can make all the difference. In this post, we will explore the top features to look for in a webcam recorder, how to choose the best one for your needs, and tips for maximizing its performance. Stay ahead of the curve with our expert advice on selecting the perfect webcam recorder to elevate your video recording experience.
Key Takeaways
- Select a webcam recorder that suits your needs by considering factors like resolution, frame rate, and compatibility with your operating system.
- Create a conducive recording environment by ensuring proper lighting, minimizing background noise, and setting up a clutter-free background.
- Adjust camera and microphone settings to optimize audio and video quality before starting your recording session.
- Take advantage of flexible recording options such as screen recording, picture-in-picture mode, and scheduled recordings to enhance your video content.
- Familiarize yourself with the recording process to efficiently capture your content, including utilizing hotkeys for quick control.
- Improve video quality and performance through editing tools like trimming, adding text overlays, and applying filters before exporting your final product.
- Share your videos on social media platforms to reach a wider audience and engage with viewers for feedback and interaction.
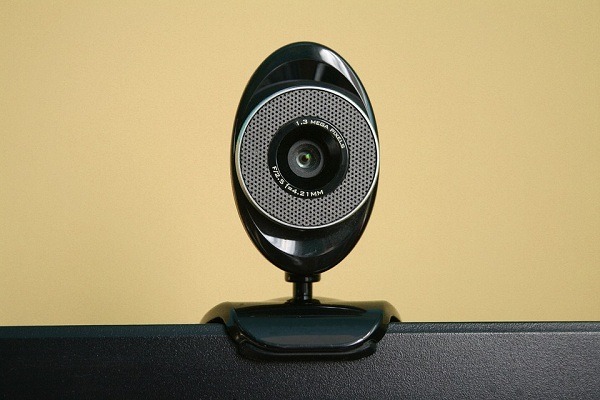
Choosing the Right Webcam Recorder
Features Comparison
When selecting a webcam recorder, consider features like video resolution, frame rate, and audio settings. Look for options that offer at least 1080p resolution for clear videos.
Evaluate if the web camera provides adjustable settings for brightness, contrast, and white balance to enhance your webcam image quality. Check if it offers filters or effects for added creativity.
Compatibility Check
Ensure the chosen recorder is compatible with your operating system and browser. Some external webcams may require specific drivers or software installations for optimal performance.
Check if the webcam supports popular browsers like Chrome, Firefox, and Safari. Compatibility issues can hinder smooth functioning during recordings or live streams.
User Reviews Analysis
Before making a decision, browse through user ratings and reviews of different webcam recorders. Look for feedback on ease of use, reliability, and customer support responsiveness.
Consider the overall satisfaction levels of users regarding video quality, audio clarity, and software stability. Real-life experiences shared by users can provide valuable insights into the performance of each recorder.
Setting Up Your Recording Environment
Proper Lighting
Position your webcam recorder in a well-lit area to ensure high-quality video recordings. Natural light is ideal for a clear image.
Adequate lighting helps the camera capture details, enhancing the overall video quality. Avoid backlighting to prevent shadows on your face.
Webcam Placement
Adjust your device to capture the best angle for your recordings. Position it at eye level for a more engaging and natural look.
Placing the webcam too high or low can distort your appearance on camera. Experiment with different angles to find the most flattering position.
Minimize Distractions
Check your recording environment for any potential distractions that could disrupt your focus. Ensure a clutter-free background.
Eliminate background noise by choosing a quiet location for recording. Consider using headphones with a built-in microphone for better audio quality.
Accessing Camera and Microphone Settings
Camera Settings
To start recording with your webcam recorder, you first need to access the camera settings. Grant the necessary permissions for camera access on your device. This step is crucial to enable the application to utilize your camera for video recording purposes. Once you have granted permission, you can adjust various camera settings. These settings may include options to modify the video quality to ensure a high-resolution output. You might find features like a mirror mode, which flips the video horizontally, useful for certain recording scenarios.
Microphone Configuration
After setting up your camera, it’s essential to configure your microphone settings for optimal audio capture. Access the microphone settings on your device and grant permission for microphone access to enable audio recording during video sessions. Testing your microphone is a critical step in ensuring clear audio output in your recordings. Make sure that the microphone is properly connected and positioned correctly before starting your recording session.
Testing Audio Quality
Once you have adjusted both your camera and microphone settings, it’s time to test the audio quality before proceeding with your recording. Start by conducting a quick test recording to check if the audio levels are adequate and clear. Listen back to the test recording and pay attention to any distortions or background noise that may affect the overall audio quality of your video. Make any necessary adjustments to the microphone settings based on the test results to achieve optimal audio clarity.
Customizing Flexible Recording Options
Full-Screen Mode
Enhance your recording experience by utilizing the full-screen mode feature. This option allows you to capture videos in a larger view, ensuring every detail is recorded accurately. By maximizing the screen space, you can focus on the content being recorded without any distractions.
Adjust the volume settings to ensure that your recordings have clear and crisp audio. The volume adjustment feature enables you to control the audio levels during recording, preventing any distortions or muffled sounds. This customization option is essential for producing high-quality videos with professional-grade audio.
Echo Effect Reduction
Improve the overall audio quality of your recordings by utilizing the echo effect reduction feature. This functionality helps eliminate any unwanted echoes or reverberations in your audio, resulting in clear and pristine sound output. By reducing echo effects, you can ensure that your recordings sound professional and polished.
Experiment with various video parameters to find the ideal settings that meet your specific requirements. Adjusting video parameters such as resolution, frame rate, and bitrate can significantly impact the quality of your recordings. By fine-tuning these settings, you can achieve optimal video quality tailored to your preferences.
- Customize recording options for a personalized experience.
- Enhance audio quality with echo effect reduction.
- Experiment with video parameters for optimal settings.
Initiating the Recording Process
Click Record
To commence the recording process, simply click on the “Record” button located on the interface. This action initiates the recording session, capturing all activities on your screen.
Monitor Progress
Throughout the recording, keep an eye on the red button indicator to ensure that the recording is ongoing. You can monitor the file size to track storage usage.
Adjust Settings
Should the need arise, feel free to adjust settings such as audio input sources or video quality while recording. This flexibility ensures that your final video meets your desired specifications.
Pause and Resume
To maintain a smooth flow in your video content, utilize the pause and resume feature judiciously. Pausing allows you to gather your thoughts or make necessary adjustments before resuming the recording seamlessly.
Editing and Exporting Videos
Edit
Utilize the editing tools available within the webcam recorder to enhance your recorded videos easily. Trim unnecessary sections and adjust the video settings for a polished final product.
Online Tool
Consider using Veed, an efficient online tool, to edit your videos seamlessly without the need for complex software installations. This web-based platform offers a user-friendly interface for editing convenience.
Save
After editing your videos, remember to save them in your preferred formats. Saving your edited videos allows for easy sharing with friends, family, or colleagues and ensures safe storage for future reference.
Veed
Explore the features of Veed when editing your videos. This online tool provides various editing options, such as adding text, images, or effects to enhance the overall quality of your recordings.
Delete
In case you are not satisfied with certain parts of your video, use the delete function within the webcam recorder to remove unwanted segments seamlessly. Deleting unnecessary content helps in refining your video content.
Export
Once you have completed editing your videos, it’s time to export them for further use. Exporting videos enables you to access them across different devices like computers, smartphones, or tablets conveniently.
Enhancing Video Quality and Performance
Adjust Settings
Enhance video quality by tweaking settings like resolution and frame rate. Higher resolution results in sharper images, while a higher frame rate ensures smoother motion.
Utilize Enhancement Features
Improve video quality further by utilizing features for enhancement such as adjusting brightness and contrast. These adjustments can make your videos more visually appealing and professional-looking.
Smooth Playback
Ensure smooth video playback by selecting appropriate processing options. Opt for encoding settings that are compatible with the platform where the video will be viewed to avoid playback issues.
Sharing Videos on Social Media
Direct Sharing
Share recorded videos directly from the webcam recorder to social media platforms effortlessly. Utilize the user-friendly interface to upload your content seamlessly.
Built-in Functionality
Leverage the built-in sharing functionalities of the webcam recorder to post engaging video content on various social media channels. Connect with your audience through interactive and visually appealing videos.
Audience Engagement
Engage with your viewers by sharing behind-the-scenes footage or tutorials using the webcam recorder. Create a more personal connection with your audience by showcasing snippets of your daily life or work processes.
Troubleshooting Common Issues
Testing Errors
If you encounter errors while using the webcam recorder, start by checking your internet connection. Ensure it’s stable for smooth video processing.
Connection Problems
Reconnect your camera and microphone if you face connection issues with the webcam recorder. This simple step often resolves connectivity problems.
Seeking Help
When all else fails, reach out to the webcam recorder’s help center. They can provide guidance on resolving any technical issues you may encounter.
Final Remarks
You’ve now mastered the art of using a webcam recorder to create engaging videos effortlessly. By following the steps outlined, you can ensure that your recordings are of the highest quality and ready to be shared with your audience. Remember, a well-prepared recording environment and familiarity with camera settings are key to producing professional-looking videos. Don’t forget to customize your recording options to suit your needs and enhance the overall video quality before sharing it on social media platforms.
Now that you have all the tools and knowledge at your disposal go ahead and start creating captivating videos with confidence. Keep refining your skills by exploring different editing techniques and troubleshooting any issues that may arise. Your audience is waiting to be impressed by your creativity and expertise in video production. Go ahead, show the world what you can do!
Frequently Asked Questions
Is it crucial to choose the right webcam recorder?
Selecting the right webcam recorder is essential for high-quality video recordings, ensuring clear visuals and crisp audio for professional-looking content.
How can I customize flexible recording options with a webcam recorder?
You can adjust settings like resolution, frame rate, and audio quality to tailor your recording experience based on your specific needs and preferences.
What steps are involved in editing and exporting videos using a webcam recorder?
After recording your video, you can use built-in editing tools to trim footage, add effects, and enhance overall quality before exporting in various formats for sharing or storage.
How can I troubleshoot common issues with my webcam recorder for video capture and recording screen and help on my computer?
If you encounter issues like poor video quality or audio problems, try checking camera/microphone settings, updating drivers, restarting the software/device, or seeking online support resources.
Why should I share my recorded videos on social media platforms?
Sharing your videos on social media not only increases visibility but also engages with a wider audience, promotes your content, and potentially drives traffic back to your website or channel.